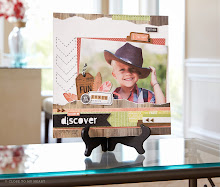
The December Stamp of the Month is always a love-themed stamp set - and this year is no exception! It's called Mad About You, and is available for just $17.95 -- UNLESS you make a $50 purchase, then it's only $5.00!
I love this stamp set. I'm not usually a big hearts and lovey stamp person, but I like the shape of the circle thingy (not really a circle, as you can see below). Lucky me - it's a Cricut Art Philosphy shape! So are the rectangular one and the hearts.
For something new and different (at least for me!) I decided to make a scrapbook page. I thought the hearts would be nice to make my very own patterned paper. Unfortunately, my pictures cover most of it up. (Is that good or bad? It IS supposed to be about the pictures, after all...)
 |
| My homemade patterned paper - save money - make your own! |
I love Planned Random Stamping. It's where you stamp your images in an imaginary, invisible triangle, starting with the largest images. So, first I stamped the "big" hearts in Petal Ink and the words in Olive Ink. I then filled in the empty spaces with Pansy Purple (small flower and heart). On top of everything, I stamped the circle thingy in Desert Sand.
Then I decided to use a larger picture, so I went through Jeannette Lynton's how-to scrapbooking book, MAGIC, for a layout that had a 5x7 picture. This is the one I picked out - but I only did the left page...and Magic has some fun secret hiding places for pictures, but I didn't do that on my page, either. Just trying to get it done!
 |
| Jeannette's MAGIC page |
 |
| My version |
I used the Color Ready Alphabets Cork (LOVE THEM) to do the name. (Didn't know there were TWO sets of alphabets in the package!) Here's a close up: (You can ink them, but I really like the cork color.)
TIP: I wanted my letters to be straight, so I used my fingernail and lightly "drew" a guide line for my letters (with a ruler). That way I wouldn't have to try to erase it (like if I'd used pencil).
TIP: I wanted my letters centered under the picture (wasn't quite as successful as I'd hoped on that). There are 7 letters in the name GARRETT, so I started with the center letter - the 2nd "R" and moved out from there.
After I'd LIGHTLY placed my letters on my invisible line, I thought it looked boring with all the letters lined up straight -- so I pried a few up and tipped the "G," the center"R," and the last "T" to make it more interesting.
I also used the Sonoma MyStickease (stickers) for the "buttons" and that square thing at the bottom. As much as I love bumpy cards, I hate bumpy scrapbook pages...weird.
I also did something I've NEVER done before - that is stamp on a picture with Staz-On (permanent ink). I was nervous -- I thought it might slip and look bad (and I'd have to replace the picture). Be sure to practice on the slick photo paper before you stamp on your actual picture.
SUPPLIES USED: How-To Book: Magic (9034, $21.95); Inks: Petal, Pansy Purple, Olive, Desert Sand, Staz-On Black; Card Stock: Colonial White, Pansy Purple, Olive, Desert Sand; Sonoma MyStickease; Color Ready Alphabets Cork (Z1450, $5.95); pictures of a super cute kid
I should probably make the other side of the layout some time. I have lots of pictures of my buddy Garrett.
Now HOP on over to {Shirley's Blog, MomNMeScrap} to see what fun love-filled ideas she has for you!
If you like what you see and want it right now, shop online right here! If you have questions, email me at lisa@lisasargent.net
Have a wonderful, blessed December!
Lisa


7 comments:
Love the random stamped paper - great projects
love the background paper - great job!
Lisa, what a sweet layout for Garrett! I love your B&T!!
Lovely layout!
Great job on random stamping. Love the layout!
Great LO! love the random stamping! awesome use of this stamp set!
Love the random stamping, but I especially love that you stamped on your photo.
Post a Comment